pho
This pack included:
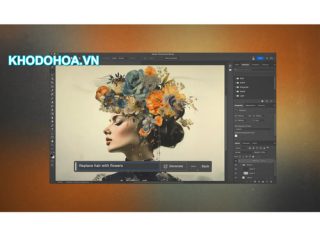
- Painterly post-processing Part 1: color
- Painterly post-processing Part 2: black & white
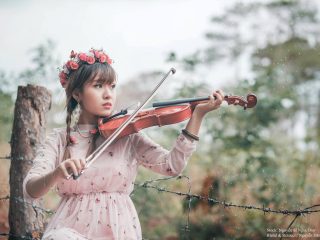
- Video-lesson of shooting of a classical portrait
- Mixed Light Photography With Post-Processing in Adobe Photoshop
Contents:
- Painterly post-processing Part 1: color
Digital photo post-processing in a painterly style using Adobe Photoshop. In this lesson you will learn how to create a painterly effect in post-processing and how to make a “breathing” piece of art out of an uninspiring digital photograph.
Lesson Content:
– RAW file conversion
– Three main steps of post-processing to achieve a painterly effect
– Retouching
– Cropping
– Shaping image (Using Liquify filter)
– How to balance composition
– About lines in frame
– How to eliminate tension in eyes and pose
– Dodge & Burn (working with the skin tones, eyes, hair, and background)
– Making skin tones more even
– How to emphasize freckles on the model’s face
– Adjusting Curves
– Subtle work with Saturation
– Toning
– Highlights, lightness, additional toning
– Sharpening
– Applying film textures
– Some thoughts on practical theory of human perception
- Painterly post-processing Part 2: black & white
In this lesson author will demonstrate two post-processing methods for the black and white photography. You will learn how to create awesome almost three-dimensional monochromatic images; soft images with depth, almost velvety.
Lesson Content:
– RAW file conversion
– Retouching
– Cropping
– Shaping image (Using Liquify filter)
– Harmony of lines in the frame
– How to eliminate tension in eyes and pose
– Dodge & Burn (working with the skin tones, eyes, hair, and background)
– Sharpening
– Adjusting Curves
– Applying film textures
– Two methods for finishing post-processing
- Video-lesson of shooting of a classical portrait
Demonstration of step-by-step creation of a classical studio portrait. You have an opportunity to take a detached view at shooting process and by the eyes of author.
There are made practical recommendations (subtitles in English) about work with model and lighting.
- Mixed Light Photography With Post-Processing in Adobe Photoshop
In this lesson we will go through three practical examples of the mixed light photography techniques including the post-processing of the taken photographs.
The lesson contains:
– Video of two parts (shooting and processing) with subtitles in English (HD 1080, 75 min):
– PSD of the two photos taken and processed in the tutorial;
– 3 film textures;
– Special vignette frame.
khuyến khích nên mua từ nhà phát hành : http://apalkin.com/tutorial.html
code : https://docs.google.com/document/d/1CdssQ5cQetIEJtLK8P9U0XQGpMkiwK7eusMbWtyRvnI/edit
-----------------***---------------
Hướng dẫn cách tải về (dowload): http://khodohoa.vn/hot-trend/huong-dan-cach-tai-ve-tai-nguyen-tren-web.html
-----------------***---------------